Are you ready to unlock the secrets of home canning for your prepping lifestyle? This comprehensive guide on “Home Canning Questions Answered” is packed with invaluable insights and expert advice that will transform the way you approach food preservation as a part of your food and water storage.
In this mind-blowing article, you’ll learn everything you need to know about mastering home canning, from beginner basics to advanced techniques that will leave you speechless. Get ready to have your prepping game forever changed!
Key Takeaways
- Discover jaw-dropping canning techniques that will blow your mind
- Master the art of preserving food for years with mind-blowing tips
- Uncover shocking truths about canning safety that could save your life
Table of Contents
Canning FAQ
Let’s start by addressing some of the most frequently asked questions about canning.
Common Canning Questions
- What is the purpose of canning?
- What foods can be canned?
- How long do canned goods last?
- Is canning difficult or time-consuming?
Answers to Frequently Asked Queries
Canning is a method of preserving food by sealing it in airtight containers and heating it to kill harmful microorganisms. This process extends the shelf life of food, allowing you to stockpile a variety of fruits, vegetables, meats, and more for long-term storage. Properly canned goods can last anywhere from 1 to 5 years, depending on the food and storage conditions.
While canning requires some time and effort, it’s a rewarding skill that can be mastered with practice. Follow these actionable steps for successful canning:
- Gather the necessary equipment (jars, lids, canner, etc.)
- Prepare the food by washing, peeling, and cutting as needed
- Pack the food into sterilized jars, leaving the appropriate headspace
- Process the jars in a water bath or pressure canner according to recipe instructions
- Allow the jars to cool completely before storing
| Equipment Needed for Canning | Description |
|---|---|
| Canning Jars | Mason jars or other heat-resistant jars with airtight lids |
| Canner | A water bath canner or pressure canner, depending on the recipe |
| Jar Lifter | A tool for safely transferring hot jars |
| Canning Funnel | Helps with neatly filling jars |
| Headspace Tool | Ensures proper headspace between food and lid |
Preserving Food Tips
Canning is just one method of preserving food, and there are several tips to ensure your hard work doesn’t go to waste. As covered in our guide to vacuum sealing for storage, vacuum sealing can also extend shelf life.
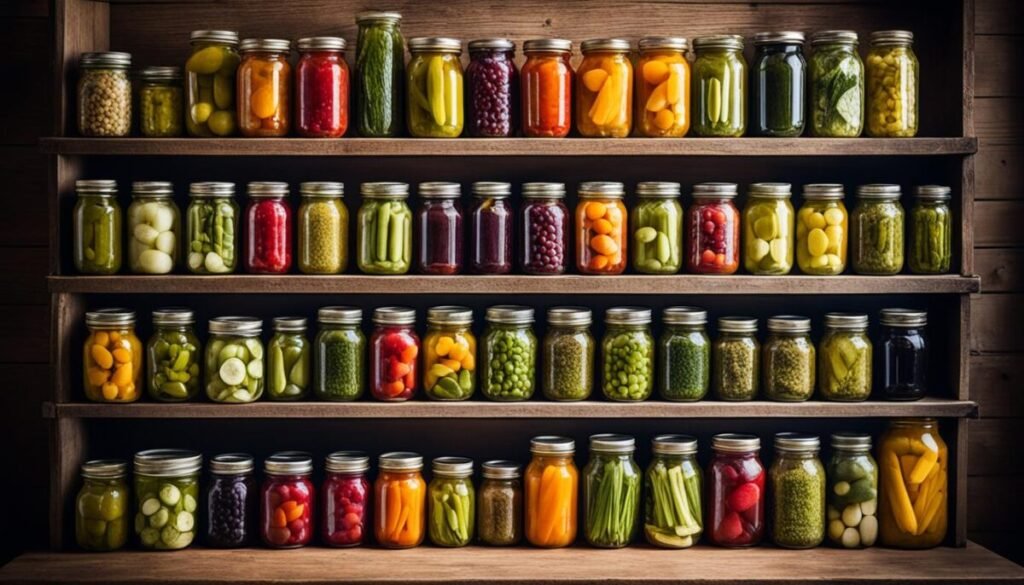
- Proper storage is crucial: Store canned goods in a cool, dark, and dry place for maximum shelf life.
- Rotate your stock: Practice first-in, first-out (FIFO) to prevent waste and ensure freshness.
- Label and date all canned goods for easy identification and tracking.
Following these preserving food tips will help you maintain a well-stocked pantry and minimize food waste.
Home Food Preservation Basics
Why Preserve Food at Home?
There are several compelling reasons to pursue home food preservation, including:
- Extending the shelf life of fresh produce and meats
- Reducing food waste and saving money
- Ensuring a reliable food supply in emergencies
- Enjoying homegrown or locally sourced foods year-round
Methods of Home Food Preservation
While canning is a popular option, there are several other methods to explore:
- Freezing: Quick-freezing fruits, vegetables, and meats for long-term storage
- Dehydrating: Removing moisture from foods to create shelf-stable dried goods
- Pickling: Preserving foods in an acidic brine or vinegar solution
- Root Cellaring: Storing root vegetables in a cool, humid environment
You can also look into more advanced methods like using Mylar bags for long-term food storage or freeze drying foods.
Getting Started with Home Canning
To begin your canning journey, you’ll need the following:
- Canning jars and lids (wide-mouth jars are versatile)
- A water bath canner or pressure canner
- Basic canning tools (jar lifter, funnel, headspace tool, etc.)
- Tested recipes from reputable sources like our canning guide
| Canning Method | Suitable Foods |
|---|---|
| Water Bath Canning | High-acid foods (fruits, pickles, tomatoes, jams, jellies) |
| Pressure Canning | Low-acid foods (vegetables, meats, soups, stews) |
Canning Safety Guidelines
Importance of Safe Canning Practices
Canning is a low-risk activity when done correctly, but failing to follow proper safety guidelines can lead to serious consequences, including foodborne illnesses. Unsafe canning practices can result in the growth of harmful bacteria, such as Clostridium botulinum, which produces a deadly toxin.
Common Canning Safety Concerns
- Using improper techniques or untested recipes
- Failing to achieve adequate heat processing
- Using damaged or compromised jars or lids
- Improper storage conditions
Preventing Foodborne Illnesses
To ensure the safety of your canned goods, follow these essential guidelines:
- Use tested recipes from reputable sources (extension services, USDA guides, etc.)
- Sterilize jars and equipment before use
- Process jars for the recommended time and pressure
- Check seals and discard any jars that didn’t seal properly
- Store canned goods in a cool, dry place
| Signs of Spoilage | Action to Take |
|---|---|
| Leaking or bulging lids | Discard the jar |
| Spurting liquid when opened | Discard the jar |
| Mold growth | Discard the jar |
| Off odors or discoloration | Discard the jar |
How to Can at Home: A Step-by-Step Guide
Preparing Jars and Equipment
- Wash jars, lids, and bands in hot, soapy water.
- Sterilize jars by submerging them in boiling water for 10 minutes.
- Prepare the canner by filling it with the appropriate amount of water.
- Gather all necessary tools (jar lifter, funnel, headspace tool, etc.).
Canning Process for Different Foods
The canning process varies slightly depending on the type of food being preserved. Follow these general steps:
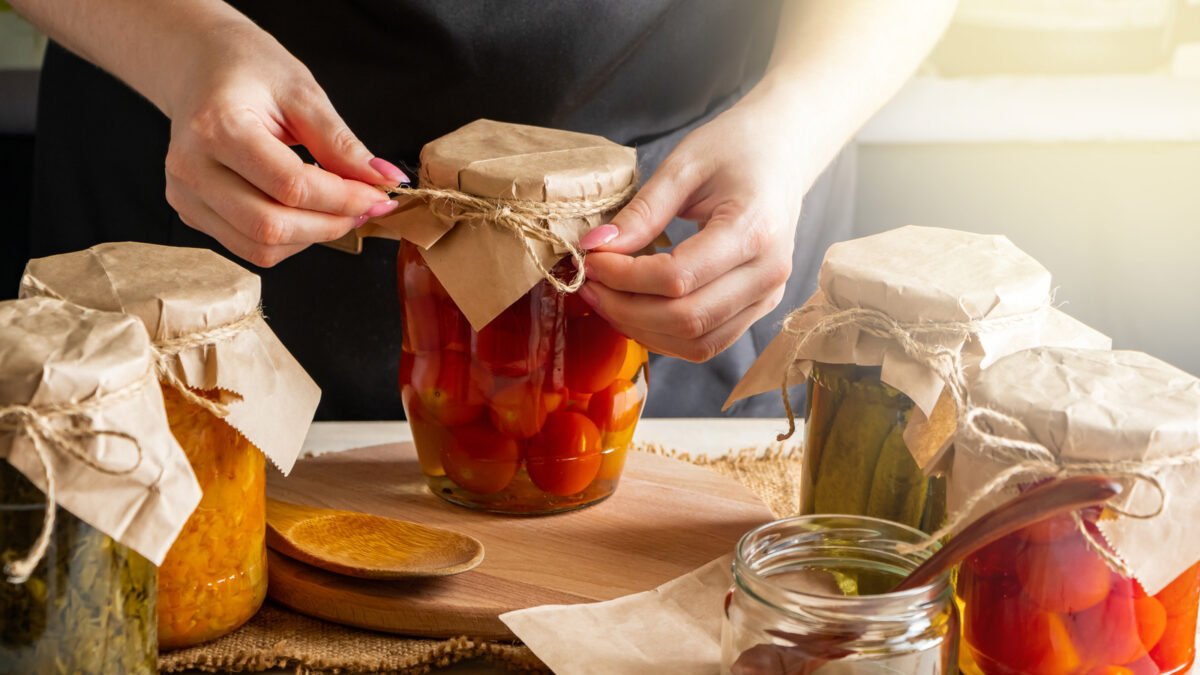
For high-acid foods (fruits, pickles, tomatoes):
- Pack the prepared food into sterilized jars, leaving the recommended headspace.
- Add the appropriate liquid (water, vinegar, syrup, etc.) as specified in the recipe.
- Remove air bubbles by gently tapping or running a non-metallic utensil along the sides of the jar.
- Wipe the jar rims clean and secure the lids and bands.
- Process the jars in a water bath canner for the recommended time.
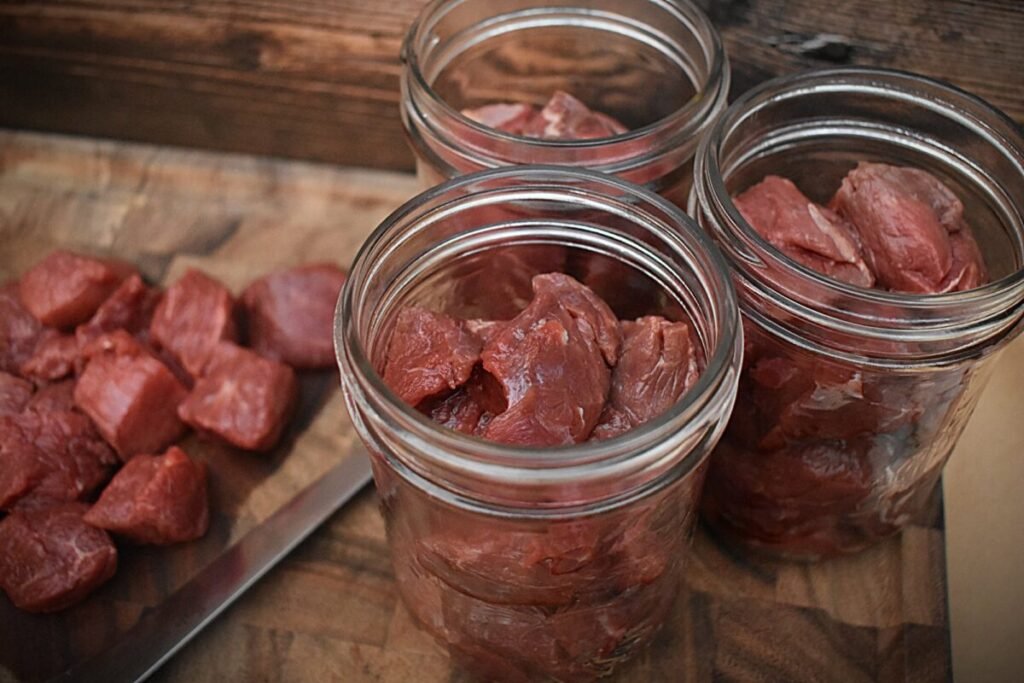
For low-acid foods (vegetables, meats, soups):
- Prepare the food as directed in the recipe.
- Pack the hot food into sterilized jars, leaving the recommended headspace.
- Add the appropriate liquid (broth, water, etc.) as specified in the recipe.
- Remove air bubbles and wipe the jar rims clean.
- Secure the lids and bands.
- Process the jars in a pressure canner at the recommended pressure and time.
Sealing and Storing Canned Goods
- After processing, remove the jars from the canner and let them cool completely on a towel or rack.
- Check seals by pressing on the center of each lid (it should not flex up and down).
- Remove the bands and label the jars with the contents and date.
- Store sealed jars in a cool, dark, and dry place for maximum shelf life.
| Recommended Headspace | Food Type |
|---|---|
| 1/4 inch | Juices, jams, jellies |
| 1/2 inch | Fruits, tomatoes, pickles |
| 1 inch | Vegetables, meats, soups |
9 Hacks And Best Canning Practices
- Oven Canning Hack: Save time and energy by oven canning! Place sealed jars in a preheated oven at 200°F (95°C) for the recommended processing time. Perfect for small batches.
- Chalk Lid Hack: Use a piece of chalk to mark the lids with the canning date and contents. The chalk won’t wash off until you’re ready to remove it.
- Vinegar Steam Hack: Add a cup of white vinegar to the canner’s water before processing. The vinegar steam helps prevent mineral buildup on your jars.
- Silicone Canning Funnel Hack: Use a silicone canning funnel to prevent food from getting trapped between the funnel and jar, ensuring a clean seal.
- Butter Knife Headspace Hack: Use the back of a butter knife to easily measure and adjust the headspace in your jars for a perfect fill.
- Pie Crust Bag Hack: Reuse clean, food-grade plastic bags (like pie crust bags) as disposable canning funnels for mess-free filling.
- Magnetic Lid Lifter Hack: Attach a strong magnet to the end of your lid lifter tool to easily pick up and maneuver hot lids during the canning process.
- Salt Brine Hack: Add a tablespoon of salt to the brine or cooking liquid when canning vegetables. The salt helps preserve crispness and flavor.
- Canning Rack Hack: Create a makeshift canning rack by rolling up a clean towel and placing it at the bottom of your canner to prevent jars from directly contacting the bottom.
Tips for Successful Home Canning
- Use fresh, high-quality produce for the best flavor and texture.
- Follow recipes exactly – don’t improvise or make substitutions.
- Adjust processing times for altitude if needed.
- Check seals and discard any unsealed jars.
- Rotate your canned goods and consume older items first.
Avoiding Common Canning Mistakes
- Don’t reuse lids – invest in new lids for each canning session.
- Don’t over-pack jars – allow enough headspace for expansion.
- Don’t cool jars too quickly – let them cool gradually to prevent breakage.
- Don’t store canned goods in direct sunlight or extreme temperatures.
Preserving Vegetables and Fruits

Canning Vegetables for Maximum Freshness
Canning is an excellent way to preserve the bounty of your vegetable garden or local farmers’ market. Some of the best vegetables for canning include:
- Tomatoes
- Green beans
- Carrots
- Beets
- Corn
- Peas
Most vegetables require pressure canning to ensure proper heat processing and safe preservation. Follow tested recipes and process times carefully.
Preserving Fruits for Year-Round Enjoyment
Canning is also a fantastic method for preserving fresh fruits, allowing you to enjoy their flavors long after their growing season has ended. Some popular canned fruits include:
- Peaches
- Pears
- Apples
- Berries
- Cherries
- Applesauce
Fruits can be canned in water, syrup, or juice, depending on your preference and recipe.
Recipes for Canned Produce
Here are a few delicious recipes to try with your canned fruits and vegetables:
- Canned Tomato Salsa: A zesty and flavorful salsa made with canned tomatoes, onions, peppers, and spices.
- Canned Green Bean Casserole: A classic Thanksgiving side dish featuring canned green beans and a creamy mushroom sauce.
- Canned Peach Cobbler: A comforting dessert made with canned peaches and a buttery biscuit topping.
- Canned Carrot and Ginger Soup: A warm and nourishing soup showcasing the flavors of canned carrots and ginger.
| Canned Vegetable | Pressure Canning Time (Quarts) |
|---|---|
| Green Beans | 25 minutes |
| Carrots | 25 minutes |
| Beets | 30 minutes |
| Corn | 55 minutes |
| Peas | 40 minutes |
Beginner Canning Advice
Getting Started with Home Canning
If you’re new to canning, start with simpler recipes like jams, jellies, or pickled vegetables. These high-acid foods can be safely processed in a water bath canner, which is generally easier to use than a pressure canner.
Essential Equipment for Beginners
As a beginner, you’ll need the following essential equipment:
- Canning jars and lids (start with pint or quart sizes)
- Water bath canner (a large pot with a rack can work in a pinch)
- Jar lifter and canning funnel
- Headspace tool (or a ruler)
- Cooking utensils (spoons, ladles, etc.)
Beginner-Friendly Canning Recipes
Try these beginner-friendly canning recipes to build your confidence:
- Strawberry Jam: A classic fruit preserve perfect for spreading on toast or biscuits.
- Dill Pickle Spears: Crisp and flavorful pickles made with fresh cucumbers and dill.
- Spicy Salsa: A zesty salsa made with tomatoes, onions, peppers, and a kick of heat.
- Applesauce: A versatile and delicious canned treat made from fresh apples.
| Beginner-Friendly Foods | Canning Method |
|---|---|
| Jams and Jellies | Water Bath |
| Pickles and Relishes | Water Bath |
| Tomato Products | Water Bath |
| Fruit Butters | Water Bath |
Home Canning FAQ
Addressing Common Canning Concerns
- Is canning safe for beginners? Yes, canning is safe when following proper guidelines and recipes. Start with water bath canning for high-acid foods.
- Can I reuse canning lids? No, it’s recommended to always use new lids for each canning session to ensure a proper seal.
- How do I know if a jar didn’t seal properly? Check seals by pressing on the center of the lid – if it flexes up and down, the jar didn’t seal.
- How long do canned goods last? Properly canned foods can last 1-5 years, depending on the food and storage conditions.
Troubleshooting Canning Issues
- Jars didn’t seal: Check for proper headspace, processing time, and lid quality. Reprocess or refrigerate unsealed jars.
- Cloudy liquid in jars: Harmless but can indicate over-processing or temperature fluctuations during storage.
- Bubbles or discoloration: Signs of spoilage – discard any jars with these issues.
Canning Tips and Tricks
Time-Saving Canning Hacks
- Blanch and shock vegetables ahead of time for easier packing.
- Use a canning funnel to neatly fill jars without spills.
- Invest in a jar lifter for safely handling hot jars.
- Label jars with contents and dates as soon as they’re processed.
Creative Canning Ideas
- Can homemade broths and stocks for easy meal starters.
- Preserve fresh herbs in vinegar or oil for flavorful seasonings.
- Create canned gift baskets with jams, pickles, and salsas.
- Experiment with unique flavor combinations like jalapeño peach jam or chipotle tomato salsa.
Home Preservation Guide
Comprehensive Guide to Home Preservation
For a more in-depth look at various preservation methods, consider investing in a comprehensive guide like the “Ball Blue Book Guide to Preserving” or the “USDA Complete Guide to Home Canning.”
Resources for Further Learning
Additionally, many university extension services offer canning classes, workshops, and online resources for those looking to deepen their knowledge. Local canning clubs or online communities can also provide a wealth of information and support.
Best Practices for Home Canning
Ensuring Safety and Quality
To ensure the safety and quality of your canned goods, follow these best practices:
- Use reliable, up-to-date resources for recipes and processing times.
- Inspect jars, lids, and equipment for cracks, dents, or defects before use.
- Adjust processing times for your altitude, if necessary.
- Allow jars to cool completely before moving or storing them.
- Store canned goods in a cool, dry place away from direct sunlight.
Achieving Consistent Results
Consistency is key for successful canning. Follow these tips for reliable results:
- Use a timer to ensure accurate processing times.
- Maintain consistent headspace between jars for even heat penetration.
- Check seals and discard any unsealed jars immediately.
- Label and date jars for easy rotation and tracking.
Common Canning Concerns
Addressing Worries and Misconceptions
- Worry: Canning is too complicated or time-consuming.
- Reality: With practice, canning becomes a straightforward process, and the time investment pays off in preserved food for months or years.
- Worry: Home-canned goods are unsafe or prone to spoilage.
- Reality: When following tested recipes and safety guidelines, home canning is a safe and reliable preservation method.
- Misconception: You can reuse canning lids indefinitely.
- Reality: Always use new lids for each canning session to ensure a proper seal.
Troubleshooting Common Issues
- Jars didn’t seal: Check for proper headspace, processing time, and lid quality. Reprocess unsealed jars or refrigerate and consume contents within a few days.
- Mold growth: Discard any jars with mold growth, as this indicates spoilage.
- Leakage or bulging lids: These are signs of spoilage – discard the affected jars immediately.
Preserving Food at Home
Benefits of Home Food Preservation
- Extended shelf life: Preserve fresh produce and meats for months or years.
- Cost savings: Reduce food waste and stretch your grocery budget.
- Self-sufficiency: Increase your food security and self-reliance.
- Flavor and nutrition: Preserve the peak flavor and nutrients of homegrown or locally sourced foods.
Getting Started with Home Preservation
To begin your home preservation journey, start small and focus on one method at a time. Canning is an excellent choice for beginners, as it allows you to preserve a wide variety of foods. Follow these steps:
- Gather the necessary equipment (jars, lids, canner, utensils, etc.).
- Find reliable, tested recipes from reputable sources like extension services or USDA guides.
- Start with simple recipes like jams, pickles, or tomato products while you’re learning.
- Practice proper safety guidelines for safe and successful canning.
- Expand your skills as you gain confidence, trying new recipes and preservation methods.
| Preservation Method | Ideal for… |
|---|---|
| Canning | Fruits, vegetables, meats, soups, sauces |
| Freezing | Fruits, vegetables, meats, baked goods |
| Dehydrating | Fruits, vegetables, herbs, jerky |
| Root Cellaring | Root vegetables, winter squash |
Mastering Home Canning
Becoming a Canning Expert
As you gain experience with canning, you’ll develop a deeper understanding of the process and may even start to experiment with your own recipes. Here are some signs that you’re becoming a canning pro:
- You can confidently adjust recipes for altitude or batch size.
- You have a well-stocked pantry of home-canned goods.
- You’ve mastered the art of pressure canning low-acid foods.
- You’re comfortable troubleshooting issues and making adjustments as needed.
Advanced Canning Techniques
Once you’ve mastered the basics, consider exploring more advanced canning techniques:
- Lacto-fermentation: Preserving foods through natural fermentation processes.
- Charcuterie canning: Canning cured meats like bacon, sausages, and pâtés.
- Canning unique ingredients: Experiment with canning less common foods like eggs, seafood, or exotic produce.
- Canning meals: Create shelf-stable, ready-to-eat meals in jars for ultimate convenience.
As you continue to expand your canning skills, you’ll be able to build a diverse and self-sufficient food storage that will serve you well in any situation.