
Table of Contents
Introduction
Mastering the art of building survival shelters for beginners can be the difference between life and death in emergency situations.
Whether you’re a seasoned outdoorsman or a novice prepper, knowing how to construct reliable shelters is an essential skill that could save your life.
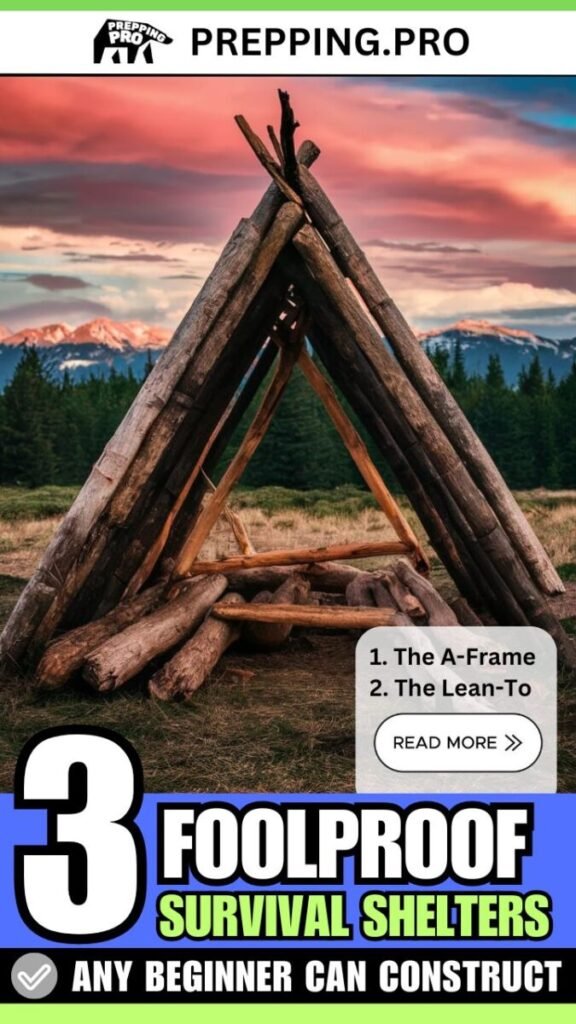
In this comprehensive guide, you’ll learn how to build three foolproof survival shelters for beginners that can protect you from the elements and provide crucial safety in various environments.
These shelters are designed to be constructed quickly and easily, even with minimal tools and resources.
By the end of this article, you’ll have the knowledge to create effective emergency shelters using materials found in nature, significantly boosting your chances of survival in the wilderness.
Key Takeaways:
- Learn three easy-to-build survival shelters suitable for beginners
- Understand the importance of shelter in wilderness survival situations
- Discover how to adapt shelter designs for different environments
- Gain insights on integrating shelter-building into your overall preparedness strategy
1. The A-Frame Shelter
The A-Frame shelter is a simple yet effective structure that provides excellent protection from rain and wind. Its triangular shape sheds water efficiently and stands up well to strong gusts.
Materials Needed
- One long, sturdy pole (ridge pole)
- Multiple smaller branches
- Cordage (paracord, vine, or improvised from plant fibers)
- Leaves, pine boughs, or other vegetation for roofing
Step-by-Step Construction Guide
- Find or create a ridge pole about 8-10 feet long.
- Secure one end of the ridge pole to the ground or a tree.
- Prop up the other end at about waist height.
- Lean shorter branches against both sides of the ridge pole.
- Weave smaller branches horizontally through the angled supports.
- Cover the frame with leaves or pine boughs, starting from the bottom and working up.
- Add a thick layer of vegetation for insulation and waterproofing.
Advantages and Limitations
- Pros: Easy to build, good rain protection, sturdy design
- Cons: Limited interior space, requires a good supply of straight branches
| Feature | Details |
|---|---|
| Construction Time | 1-2 hours |
| Person Capacity | 1-2 people |
| Best Environment | Forested areas |
Actionable Tips:
- Practice building an A-Frame shelter in your backyard before heading into the wilderness.
- Always carry a length of paracord in your survival kit for lashing the frame together.
- Learn to identify local plants that make good roofing material.
2. The Lean-To Shelter
The Lean-To shelter offers quick construction and versatility. This design works well in various environments and provides good protection from wind and rain when oriented correctly.
Required Resources
- One long, sturdy pole
- Several shorter poles or large branches
- Cordage
- Leafy branches, bark, or a tarp for roofing
Building Process
- Locate two trees about 6-8 feet apart or use forked sticks as supports.
- Place your long pole between the supports at about chest height.
- Lean shorter poles against the horizontal beam at a 45-degree angle.
- Weave smaller branches horizontally through the angled supports.
- Cover the frame with leaves, bark, or a tarp, starting from the bottom.
- Add extra layers for insulation and waterproofing.
Pros and Cons
- Pros: Quick to build, adaptable to different environments, can be scaled up easily
- Cons: One-sided protection, requires careful orientation against the wind
| Feature | Details |
|---|---|
| Construction Time | 30 minutes – 1 hour |
| Person Capacity | 1-3 people |
| Best Environment | Versatile – forests, plains, beaches |
Actionable Tips:
- Orient the open side of your Lean-To away from the prevailing wind.
- Create a reflector wall opposite the open side to bounce heat from your fire into the shelter.
- Consider building two Lean-Tos facing each other with a fire in between for a more enclosed shelter.

3. The Debris Hut
The Debris Hut excels in providing warmth through insulation. This shelter mimics the design of a sleeping bag and works well in cold environments.
Gathering Materials
- One long, sturdy pole
- Several shorter poles
- Lots of leaves, pine needles, grass, or other soft debris
- Small branches and twigs
Construction Technique
- Find a pole slightly longer than your height.
- Prop one end on a support (stump, rock, or forked stick) at about waist height.
- Anchor the other end on the ground.
- Lean shorter sticks along both sides of the ridgepole, forming a ribcage shape.
- Cover the frame with a thick layer of leaves or other debris.
- Create a small entrance at the lower end.
- Stuff the inside with soft debris to create a nest-like sleeping area.
Benefits and Drawbacks
- Pros: Excellent insulation, low profile, uses mostly ground materials
- Cons: Time-consuming to build, limited headroom, requires a large amount of debris
| Feature | Details |
|---|---|
| Construction Time | 2-3 hours |
| Person Capacity | 1 person |
| Best Environment | Cold, debris-rich forests |
Actionable Tips:
- Make your debris layer at least 2 feet thick for proper insulation.
- Create a small drainage trench around your hut to divert rainwater.
- Use a garbage bag or emergency blanket as a waterproof layer under your debris.
Essential Tools for Shelter Building
The right tools can significantly speed up and improve your shelter construction. Some items should be part of your camping essentials, while others can be improvised from natural materials.
Must-Have Items
- Fixed-blade knife
- Folding saw
- Paracord
- Emergency blanket
- Tarp
Improvised Tools from Nature
- Sharp rocks for cutting
- Sturdy sticks for digging
- Vine or tree bark for cordage
- Large leaves for roofing
| Tool | Uses |
|---|---|
| Fixed-blade knife | Cutting branches, shaping wood, creating notches |
| Folding saw | Cutting larger branches and small trees |
| Paracord | Lashing frame together, creating guy lines |
Actionable Tips:
- Practice using your tools before you need them in an emergency.
- Learn techniques for improvising tools from natural materials.
- Regularly maintain and sharpen your knife and saw.
Choosing the Right Location for Your Shelter
The location of your shelter can be as important as its construction. A well-chosen site enhances your shelter’s effectiveness and contributes to your overall safety.
Terrain Considerations
- Look for flat, dry ground.
- Avoid low-lying areas prone to flooding.
- Stay away from dead trees or loose rocks that could fall.
- Seek natural windbreaks like large boulders or dense vegetation.
Water and Food Proximity
- Build within walking distance of a water source, but not too close to attract animals.
- Consider proximity to foraging areas or fishing spots.
- Balance the need for resources with the desire for concealment.
Natural Hazards to Avoid
- Flash flood zones
- Avalanche-prone slopes
- Areas with poisonous plants or dangerous wildlife
- Exposed ridgelines during thunderstorms
| Factor | Ideal Condition |
|---|---|
| Ground | Flat, slightly elevated, well-drained |
| Water Source | Within 100-200 yards |
| Natural Protection | Windbreak present, some overhead cover |
Actionable Tips:
- Scout multiple locations before deciding on your shelter site.
- Consider how the sun’s position will affect your shelter throughout the day.
- Look for animal signs to avoid building near their territories or paths.
Insulation and Weatherproofing Techniques
Proper insulation and weatherproofing transform a basic structure into an effective emergency shelter. These techniques are crucial for off-grid living and long-term wilderness survival.
Natural Insulation Materials
- Dry leaves and pine needles
- Moss
- Grass and reeds
- Animal fur (if available)
Waterproofing Methods
- Layered roofing with overlapping materials
- Using birch bark or large leaves as a waterproof layer
- Creating a steep pitch to encourage water runoff
- Digging trenches around the shelter to divert water
Importance in Off-Grid Living Scenarios
Effective insulation and weatherproofing:
- Conserve body heat
- Prevent hypothermia
- Keep gear dry
- Extend shelter lifespan
| Material | Insulation Value | Waterproof Rating |
|---|---|---|
| Dry Leaves | High | Low |
| Pine Boughs | Medium | Medium |
| Birch Bark | Low | High |
Actionable Tips:
- Create a thick bedding layer to insulate you from the cold ground.
- Use the “shingle method” when layering roofing materials for better water runoff.
- Test your shelter’s waterproofing by pouring water over it before a rainstorm hits.
Fire Safety and Shelter Heating
Fire provides warmth, light, and psychological comfort in survival situations. Proper fire placement and management are essential camping essentials and crucial survival skills.
Safe Fire Placement
- Clear a wide area around your fire pit.
- Create a fire reflector wall using logs or rocks.
- Keep the fire a safe distance from your shelter’s entrance.
- Consider wind direction to avoid smoke filling your shelter.
Reflecting Heat into Your Shelter
- Build a reflector wall behind your fire.
- Position your shelter to capture reflected heat.
- Use shiny materials like space blankets to enhance heat reflection.
Fire as a Crucial Camping Essential
- Provides warmth and comfort
- Allows for food preparation and water purification
- Serves as a signal for rescue
- Deters predators and insects
| Fire Type | Best Use | Heat Output |
|---|---|---|
| Teepee Fire | Quick heat, cooking | High |
| Long Fire | All-night warmth | Medium |
| Dakota Fire Hole | Concealment, windy conditions | Low |
Actionable Tips:
- Always keep fire-starting materials in a waterproof container.
- Practice multiple fire-starting methods before you need them in an emergency.
- Never leave a fire unattended and always fully extinguish it before leaving your camp.
Adapting Shelters for Different Environments
Different environments present unique challenges and opportunities for shelter building. Adapting your techniques to the specific conditions enhances your outdoor preparedness.
Desert Shelters
- Focus on shade and ventilation.
- Use light-colored materials to reflect heat.
- Build low to the ground to minimize exposure to hot winds.
- Utilize natural features like rock overhangs.
Snow Shelters
- Snow caves provide excellent insulation.
- Quinzhees offer quick shelter in deep snow.
- Use snow blocks to build wind barriers.
- Create a raised sleeping platform to avoid cold air pooling.
Tropical Shelters
- Prioritize protection from rain and insects.
- Build elevated platforms to avoid ground moisture and crawling insects.
- Use thatched roofs for better water runoff.
- Ensure good ventilation to combat humidity.
| Environment | Key Shelter Features | Primary Concerns |
|---|---|---|
| Desert | Shade, ventilation | Heat, dehydration |
| Snow | Insulation, wind protection | Cold, hypothermia |
| Tropical | Rain protection, elevation | Moisture, insects |
Actionable Tips:
- Research the specific environment you’ll be in before your trip.
- Carry adaptable shelter materials like a versatile tarp.
- Learn to identify and use local materials effectively in each environment.
Long-Term Shelter Considerations
For extended wilderness survival or off-grid living scenarios, your initial emergency shelter may need to evolve. Long-term shelters require more planning and resources but offer increased comfort and security.
Expanding Basic Shelters
- Add multiple rooms or sections for different purposes.
- Improve ventilation systems.
- Create storage areas for food and equipment.
- Develop waste management systems.
Incorporating Found Materials
- Use fallen logs for more permanent structures.
- Salvage man-made materials if available.
- Create clay bricks or adobe for insulation and structure.
- Weave plant fibers for roofing or wall material.
Planning for Extended Wilderness Survival
- Choose a location with long-term sustainability in mind.
- Develop renewable food and water sources near your shelter.
- Create camouflage or concealment features.
- Establish a perimeter for safety and animal control.
| Time Frame | Shelter Type | Key Improvements |
|---|---|---|
| 1-7 days | Basic survival shelter | Weather protection |
| 1-4 weeks | Enhanced shelter | Improved insulation, basic amenities |
| 1+ months | Long-term shelter | Multiple rooms, sustainable systems |
Actionable Tips:
- Continuously assess and improve your shelter as time and resources allow.
- Learn primitive building techniques to make the most of natural materials.
- Develop a long-term survival plan that includes shelter improvements.
Shelter as Part of Your Bug-Out Strategy
A well-planned bug-out strategy incorporates shelter considerations for various scenarios. Your ability to quickly establish shelter can be crucial in emergency situations.
Portable Shelter Options
- Lightweight backpacking tents
- Bivy sacks for minimalist shelter
- Hammocks with rain flys for forested areas
- Tarps for versatile, quick shelter
Prepping Your Bug-Out Location
- Scout and prepare multiple shelter sites in advance.
- Cache building materials and tools at your chosen locations.
- Create maps and mark potential natural shelter spots.
- Practice building shelters at your bug-out location.
Integrating Shelter into Your Overall Plan
- Balance shelter gear with other essential supplies in your bug-out bag.
- Plan your route with potential shelter locations in mind.
- Develop skills to build shelters using minimal tools and materials.
- Consider group shelter needs if bugging out with family or a team.
| Shelter Type | Weight | Set-Up Time | Best Use |
|---|---|---|---|
| Ultralight Tent | 1-3 lbs | 5-10 minutes | All-weather protection |
| Tarp | 0.5-2 lbs | 2-5 minutes | Versatile, quick shelter |
| Bivy Sack | 0.5-1.5 lbs | 1-2 minutes | Minimalist, stealth camping |
Actionable Tips:
- Regularly practice setting up your portable shelter to ensure quick deployment.
- Include multiple shelter options in your bug-out bag for flexibility.
- Teach all family members basic shelter-building skills as part of your preparedness plan.
Natural Disaster Preparedness and Shelter
Natural disaster preparedness often requires unique shelter strategies. Different types of disasters necessitate varied approaches to ensure safety and survival.
Adapting Shelters for Specific Disasters
- Hurricanes: Seek sturdy, elevated structures away from flood zones.
- Earthquakes: Choose open areas away from buildings and potential debris.
- Tornadoes: Identify underground or interior room shelters.
- Wildfires: Prepare fire-resistant structures or evacuation plans.
Urban vs. Rural Shelter Considerations
- Urban areas: Identify public shelters and reinforce safe rooms in homes.
- Rural areas: Develop self-sufficient shelter options and stockpile supplies.
- Suburban locations: Balance community resources with personal preparedness.
Community Shelter Planning
- Participate in local emergency preparedness meetings.
- Know the locations of designated community shelters.
- Contribute to community shelter improvement projects.
- Develop a neighborhood support network for emergencies.
| Disaster Type | Ideal Shelter Characteristics | Key Preparedness Actions |
|---|---|---|
| Hurricane | Strong construction, elevated, away from coast | Board windows, stockpile supplies |
| Earthquake | Open areas or reinforced buildings | Secure heavy furniture, practice drop-cover-hold |
| Tornado | Underground or interior room without windows | Create a tornado kit, identify safe rooms |
Actionable Tips:
- Create disaster-specific emergency kits for your home and vehicle.
- Develop and practice a family emergency plan for each type of disaster.
- Stay informed about local disaster risks and evacuation routes.
Conclusion
Mastering basic shelter construction is a fundamental survival skill that can make a critical difference in emergency situations.
The three foolproof shelters we’ve explored—the A-Frame, Lean-To, and Debris Hut—provide a solid foundation for wilderness survival and outdoor preparedness.
Remember these key points:
- Shelter is your first priority in most survival situations.
- Practice building these shelters before you need them in an emergency.
- Adapt your shelter strategy to your environment and the specific challenges you face.
- Incorporate shelter considerations into your overall preparedness plan.
By developing these skills and incorporating them into your bug-out shelters and natural disaster preparedness strategies, you significantly increase your chances of survival in challenging situations.
Continue to practice and refine your shelter-building techniques, and always prioritize safety and adaptability in your preparations.
For those looking to expand their survival knowledge beyond shelter-building, consider exploring other essential skills such as fire-starting techniques, navigation without a compass, and identifying edible wild plants.
These complementary skills will further enhance your ability to thrive in survival situations.
Remember, the more you practice and prepare, the better equipped you’ll be to handle any survival scenario.
Stay prepared, stay safe, and keep honing your survival skills.